My Perfect Bug Bounty Docker Setup
I hate installing things on my computer because of the bloated slow mess it becomes over time. So when I found out about docker I fell in love with it, I could build a docker image with whatever versions of tools and OS I wanted for my client and then blow it away when I no longer had a need for it.
So what is the checklist for my perfect docker configuration for bug bounties?
- Runs from Windows 10, as that's my desktop computer
- Has to use docker, because docker trumps virtual machines because it's quicker and smaller
- I want my docker images to use a VPN, so I don't get an angry family when we are blacklisted
- Command-line rocks but sometimes you might want to connect via RDP to the box to test something with a mouse etc
- Sometimes I might just want to use a UI based tool without RDP directly in my windows environment
Create Docker Environment
Creating the Kali Linux environment in a command prompt:
docker run -t -i kalilinux/kali-rolling /bin/bash
Now within the docker image, install the meta package we want to use:apt-get update
apt-get dist-upgrade
apt install kali-linux-default
Install RDP and XFCE (there are other flavors, feel free to experiment with your preferred flavor)
apt-get install kali-desktop-xfce xrdp
Let's add a user for RDP access, change my user to whatever username you desire
adduser myuser
Optionally give this user sudo privs, yep its lazy don't judge me :)
usermod -aG sudo myuser
Save our docker image so we have a starting point whenever we want a new kali image. Change xxxxxxxx to be the image id and foundry/kali to be whatever your naming conventions are, this should be at the windows command prompt
docker commit xxxxxxxx foundry/kali:v1
You can now terminate delete the running docker image.
Create a VPN instance
We will create a VPN instance that all our docker images traffic will go via, we will be using the gluten docker image (https://github.com/qdm12/gluetun) to host our VPN as it's flexible allows lots of VPN options, and allows us to adjust the firewall.

Woah there what is all that, lets break it down:
The most important part to understand is the ports, we have to list all the ports that any of the child docker images will want to expose out. You will need 3390: as that's what the RDP will communicate over, 6000 and 22 is what SSH X11 Forwarding will communicate over
Of course, read the documentation and set up your username and password for VPN along with the VPN choice mine is nordvpn.
The FIREWALL_OUTBOUND_SUBNETS is linking to your local desktop machine subnet. You can lock this down further if you want a more secure world.
Install Windows X Server
There are several options here but I used VcXsrv (https://sourceforge.net/projects/vcxsrv) and it did what I was looking for there may be better options so feel free to report back if you found something better. Xming had some issues with clipboards but maybe that was just my experience.
Just install the defaults and fire it up:

I choose multiple windows here so that each one that fired up was standalone, but again feel free to change to what works for you. What is important here is the display number should be 0 which maps back to the 6000 port we have open. if this is 1 then we would need port 6010 open. -1 will just find the spare unused display which should always default to 0

The other gotcha is to make sure you check the disabled access control as this will allow access.
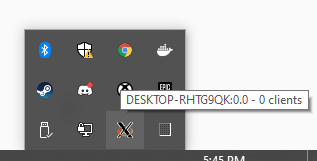
Once you have it installed you should see it running with “:0.0” which is what maps to the next section DISPLAY settings
Connect Kali and the VPN
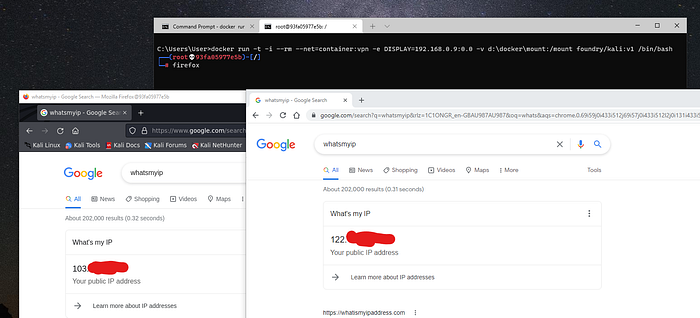
The image is created via the following command:

The DISPLAY should be pointing at your desktop, I have also mounted a volume here which is optional but allows some persistence of certain files and easy copying if needed.
Let's See it work
At the Kali Linux prompt just type firefox, and viola you should see the firefox app that is running on your kali Linux box running. In this image below you can see my windows desktop with a kali firefox browser showing its public IP along with my windows chrome browser showing its public IP
What about RDP
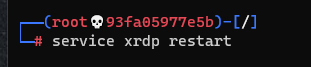
First, you will need to start the RDP service on the docker kali image
Then use your remote desktop connection to connect:
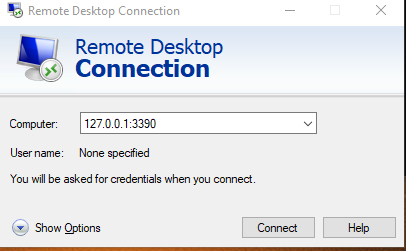
Viola, we now have RDP access to the kali box if we would like that as well

Wow that was a long post but hopefully you got some information out of it, please feel free to leave a comment if anything is confusing and I will try to update this post where needed